Add, Edit and Delete
Add Supports
Auto Support
Entry | |
|---|---|
| Support Settings Panel | Auto Support > Add Auto Support |
| Shortcut | Shift + S |
Automatically generates support structures based on support parameters and models' geometric features to save users' time and effort.
Manual Support
Entry | |
|---|---|
| Support Settings Panel | Auto Support > Add Support |
| Shortcut | A |
You can manually add supports based on your own experience and understanding of models to achieve best printing results.
Support Types
Adaptive Support
Entry | |
|---|---|
| Manual Support Options | Option 1 |
| Shortcut | 1 |

Adaptive supports would generate suitable support intelligently to match model features.
Vertical Support
Entry | |
|---|---|
| Manual Support Options | Option 2 |
| Shortcut | 2 |

Place supports with contacting segments perpendicular to model surfaces.
Upright Support
Entry | |
|---|---|
| Manual Support Options | Option 3 |
| Shortcut | 3 |

Place supports that are perpendicular to the print platform.
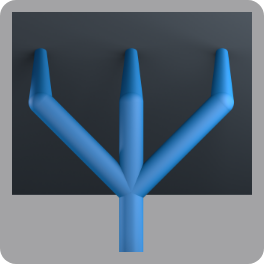
Branch Support
Entry | |
|---|---|
| Manual Support Options | Option 4 |
| Shortcut | 4 |
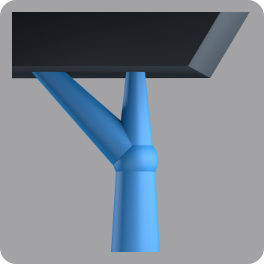
Branch Supports are single-segment supports, usually used to connect model surface with the mid-segment of another support or connect two supports, in order to further stabilize a model.
Joint Support
Entry | |
|---|---|
| Manual Support Options | Option 5 |
| Shortcut | 5 |
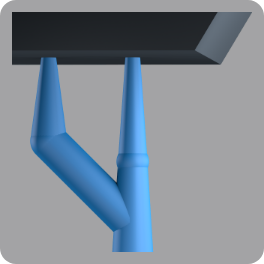
Joint Supports consists of two support segments. Similar to branch supports, they can be connected to models or other supports.
Small Pillar
Entry | |
|---|---|
| Manual Support Options | Option 6 |
| Shortcut | 6 |
This is a type of thin support connecting the model and another support's middle segment or connecting two points on the surfaces of a model. Smaller pillars are ideal of models with small overhangs and many details by providing fine supports to small areas.
Users can enable the Automatic Attachment option when using Branch, Joint and Small Pillar supports and customize the parameters Attachment Radius and Attachment Angle in the More Support Settings panel under the "Advanced Settings" window.
Forked Support
Entry | |
|---|---|
| Manual Support Options | Option 7 |
| Shortcut | 7 |
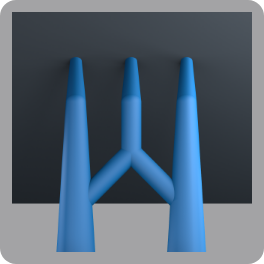
Branch Supports connect with models on top and branch off to connect to the mid-segments of adjacent supports to form stable support grids.
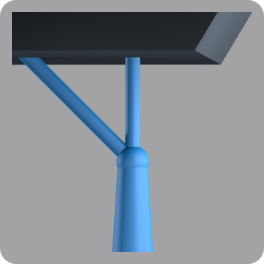
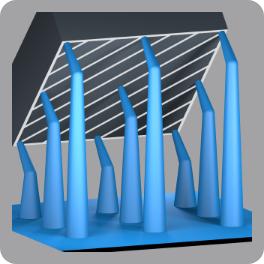
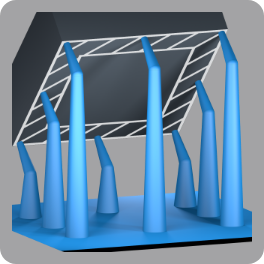
Tree Support
Entry | |
|---|---|
| Manual Support Options | Option 8 |
| Shortcut | 8 |
Tree Supports has several branching supports from the main pilar, similar to tree branch structures. Tree Supports can provide even support forces to effectively prevent model deformation.
Contour Support
Entry | |
|---|---|
| Manual Support Options | Option 9 |
| Shortcut | 9 |

Add supports at a given height on a model.
Face Support
Entry | |
|---|---|
| Manual Support Options | Option 10 |
| Shortcut | 0 |
Add supports to a selected face on a model.
Boundary Support
Entry | |
|---|---|
| Manual Support Options | Option 11 |
| Shortcut | - |
Add supports to the boundary of a selected face on a model, to avoid overhang warping or breaking during printing.
Symmetrical Support
Entry | |
|---|---|
| Function Menu | Support > Symmetrical Support |
| Shortcut | Ctrl + Shift + S |
Detect symmetrical surfaces on a model and add mirrored supports to both sides of selected symmetrical planes.
Merge Supports
Entry | |
|---|---|
| Function Menu | Support > Merge Supports |
| Shortcut | Ctrl + Shift + M |
Automatically merge some or all supports to simplify support structures and lower print cost.
Add Supports to Overhangs
Entry | |
|---|---|
| Function Menu | Support > Overhang Detection > Add Supports to Overhangs |
Manually or automatically add supports to overhang areas after running Overhang Detection can prevent overhangs from deforming or breaking during printing.
Edit Support
Entry | |
|---|---|
| Support Settings Panel | Auto Support > Edit Support |
| Shortcut | E |
Modify added supports, including adjusting support size, density and locations to optimize print results.
Delete Support
Entry | |
|---|---|
| Support Settings Panel | Auto Support > Delete Support |
| Shortcut | D |
Remove unnecessary support structures to save material.