Model Processing
This chapter introduces model processing functions of CHITUBOX Pro, including selection, moving, rotating, scaling, mirroring, copying, splitting models, automatic layout, adding labels, Boolean operations, cutting, hollowing and hole creation.
Click on the "Prepare" tab at the top of the function menu to open the prepare menu.
Select
Click to select the model in the canvas.
Drag and select all models within the selection box.
Transform
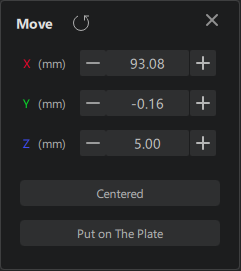
Move
Entry | |
|---|---|
| Toolbar | Move |
| Shortcut | Ctrl + M |
moves selected models. You can also enter coordinates in the move panel to accurately move models.
-
Center: Place selected model at the center of the print platform. Multiple model within selection will be centered based on the center of the model group.
-
On Platform: Place selected model on the print platform based on the lowest point of the model.
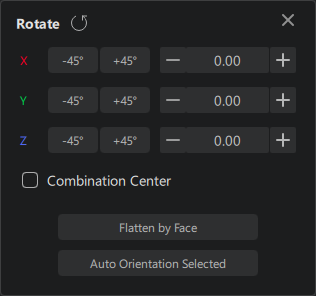
Rotate
Entry | |
|---|---|
| Toolbar | Rotate |
| Shortcut | Ctrl + R |
rotates selected models. You can also enter degree angles in the rotate panel to accurately rotate models.
-
Combination Center: Set the center of rotation at the combination center of multiple selected models.
-
Orient to Face: Place selected models on the platform by aligning a model surface to the platform.
-
Auto Orientation: Rotate selected models to the optimal position.
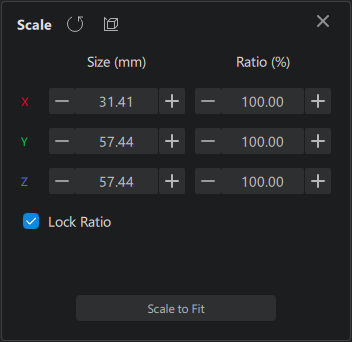
Scale
Entry | |
|---|---|
| Toolbar | Scale |
| Shortcut | Ctrl + Alt + S |
scales selected models. You can also input the exact size or scale ratio to accurately scale models.
Global Coordinates: Align the scale controller to the global coordinates.
Local Coordinates: Align the scale controller to the model's local coordinates.
Reset: Reset the model scale to 100% of the original size.
-
Lock Ratio: when enabled, selected models will be scaled at the same ratio in the X,Y and Z directions, in order to keep the overall ratio of the model and avoid deformation.
-
Scale to Fit: automatically adjust the size of selected models to fit on the print platform.
Mirror
Entry | |
|---|---|
| Toolbar | Mirror |
| Shortcut | Ctrl + I |
mirrors selected models based on a selected axis.

- Keep the Original Model: when enabled, both of the original model and the mirrored model will be kept.
Copy
Entry | |
|---|---|
| Function Menu | Prepare > Copy |
| Shortcut | Ctrl + V |
copies one or multiple selected models, and add specified number of copied models to the current project.
Split Model
Entry | |
|---|---|
| Function Menu | Prepare > Split Model |
| Shortcut | Shift + U |
splits the original assembly model into independent part models.
Auto Layout
Entry | |
|---|---|
| Function Menu | Prepare > Auto Layout |
| Shortcut | Shift + A |
quickly layouts the models in the project according to the set arrangement rule, including auto-layout at the center of the print platform, and arrange along the X-edge or Y-edge of the platform.
- Allow Raft Overlapping: allow rafts of models to overlap during auto layout.
- Lock Model Rotation (Z): lock the rotation angle of models to keep a fixed orientation during rotation.
- Loop Layout: automatically arrange models in a loop.
- Layout Scope: set the scope for the auto layout operation.
Add Tag
adds custom text tag to models.
You can control the text style and alignment in the panel. Click on the text box to input tag text.
- Height(mm): the text height for the tag with default at 5mm.
- Angle: the angle at which the text is rotated clockwise.
- Depth(mm): thickness/depth of the tag.
- Mode: choose between extrusion tag or engraving tag.
Boolean Operation
executes Join, Intersect or Subtraction operations between selected models.
Hollow
Entry | |
|---|---|
| Function Menu | Prepare > Hollow |
| Shortcut | Shift + H |
hollows selected models based on custom parameters.
- Wall Thickness: the remaining wall thickness for the hollowed object(the shaved off thickness under Outer Hollow mode).
- Precision: the density of triangles generated for the hollowing surfaces. 0 represents the minimum precision and 1 is the maximum precision.
- Mode:
- Inner Hollow: leaves an enclosed cavity after hollowing.
- Outer Hollow: shave off material from the outer surface based on Wall Thickness.
- Bottom Through: similar effect to Inner Hollow without keeping the bottom of the object.
- Infill: generate preset infill structure during the hollowing operation.
- Animation: displays animation showing the hollowing process(refer to the progress bar for the actual process)。
- Keep the Main Cavity: generates one single cavity during the hollowing operation.
Infill Type
Scaffold
Infill cavities with scaffold structures.
- Infill Density (%): the density of the infill structure.
Hive
Infill cavities with hive structures. The hive structures shall be perpendicular to the platform.
- Hexagon Diameter(mm): the diameter of each hive hexagon's circumscribed circle.
- Wall Thickness(mm): the distance between each adjacent hexagons.
- Crossing Hole Starting Height(mm): the minimum height of holes cross the hexagon structures.
Grid
Infill cavities with grid structures. The grid structures shall be perpendicular to the platform.
- Grid Width(mm): the width of each square grid.
- Wall Thickness(mm): the distance between each adjacent grids.
- Crossing Hole Starting Height(mm): the minimum height of holes cross the grid structures.
Round crossing holes are automatically generated between adjacent holes in order to relieve pressure during printing for hive and grid structures. The diameter of the crossing holes is 1/6 of the hexagons' circumscribed diameter or grid width. The starting height of the crossing holes is based on the centerline of the holes and user-set height. Additional groups of crossing holes are generated with equal spacing of The center of the hexagons' circumscribed diameter or grid width.
Hole
Entry | |
|---|---|
| Function Menu | Prepare > Hole |
| Shortcut | Shift + D |
Create holes on selected models based on custom parameters.
- Hole Mode: Choose between generating Penetrating or Non-penetrating holes.
- Edge Number: As number of edge increases, the shape of the hole will get close to a circle.
- Φ: The diameter of the hole.
- B: The maximum depth of the hole for non-penetrating holes.
- C: The angle between the side wall of the hole and the bottom plane of the hole.
- Rotation: The rotation angle of the hole.
- Retain Plug: Whether to keep the excavated material as a separate part.
- Angle: Digging angle perpendicular to the screen or to the model.
- Limited Depth B: Turning On/Off limiting hole depth as defined by B under Penetrating mode.